Detailed guide

Create Project

The project setup form for starting a new delivery record with the right client, status, and planning context.

Use this form to create a clean record the first time or safely update an existing one without guessing which field drives downstream behavior.

Quick summary

  • Create a project after confirming the correct client and naming convention.
  • Use Quick Add Client only when the missing client is truly new, not when you just need to search the dropdown again.
  • Review status and dates before saving so the project lands in the correct reporting state.

Put it into practice

  1. Open the project form from the Projects list.

    InteractionsProjects page, top-right: click Create New Project.
    Open the project form from the Projects list.
  2. Enter core project details.

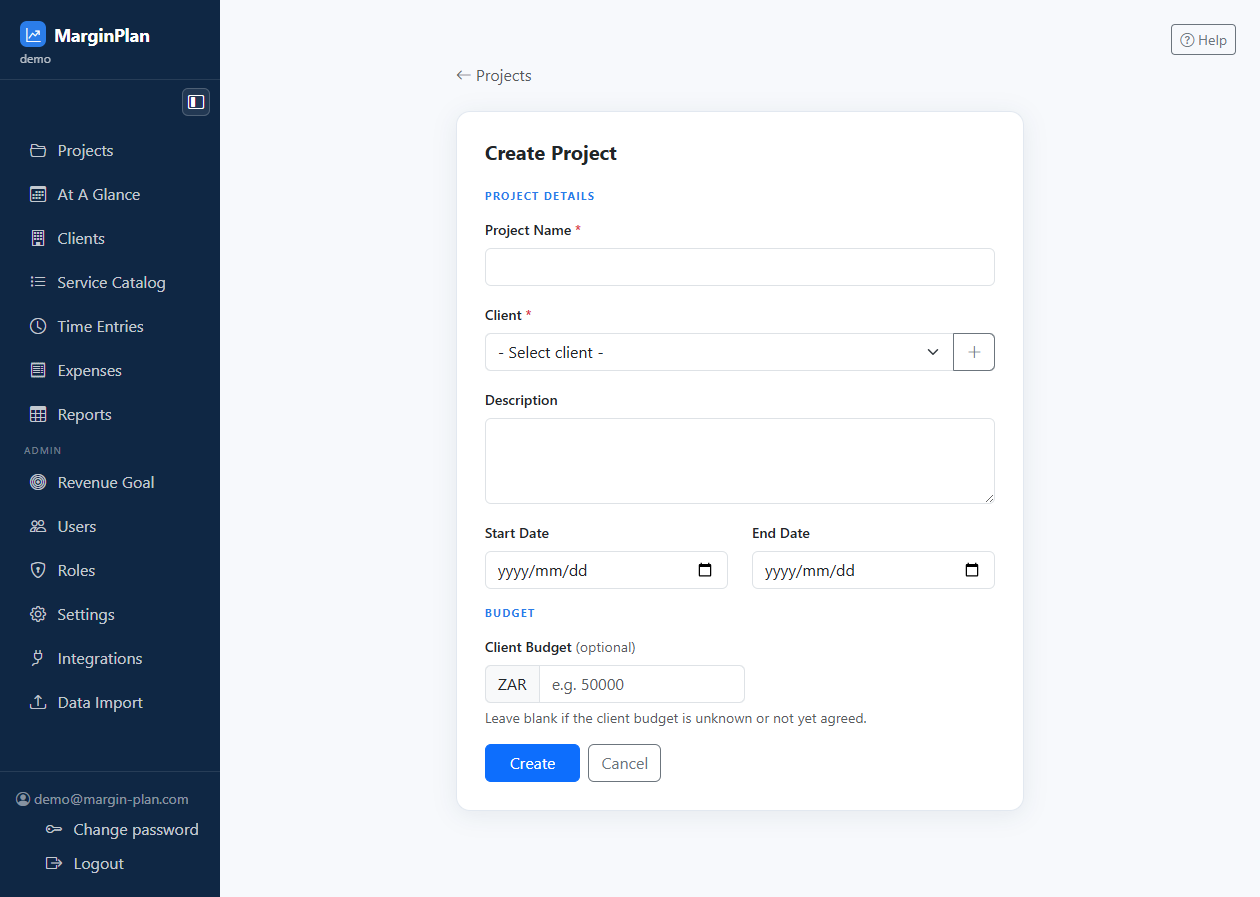
    InteractionsCreate Project form: complete Project Name, description, date fields, status and client budget.
    Enter core project details.
  3. Pick the client for this project.

    InteractionsCreate Project form: use the Client dropdown at the top of the form.
    Pick the client for this project.
  4. Use Quick Add Client only if the client is missing.

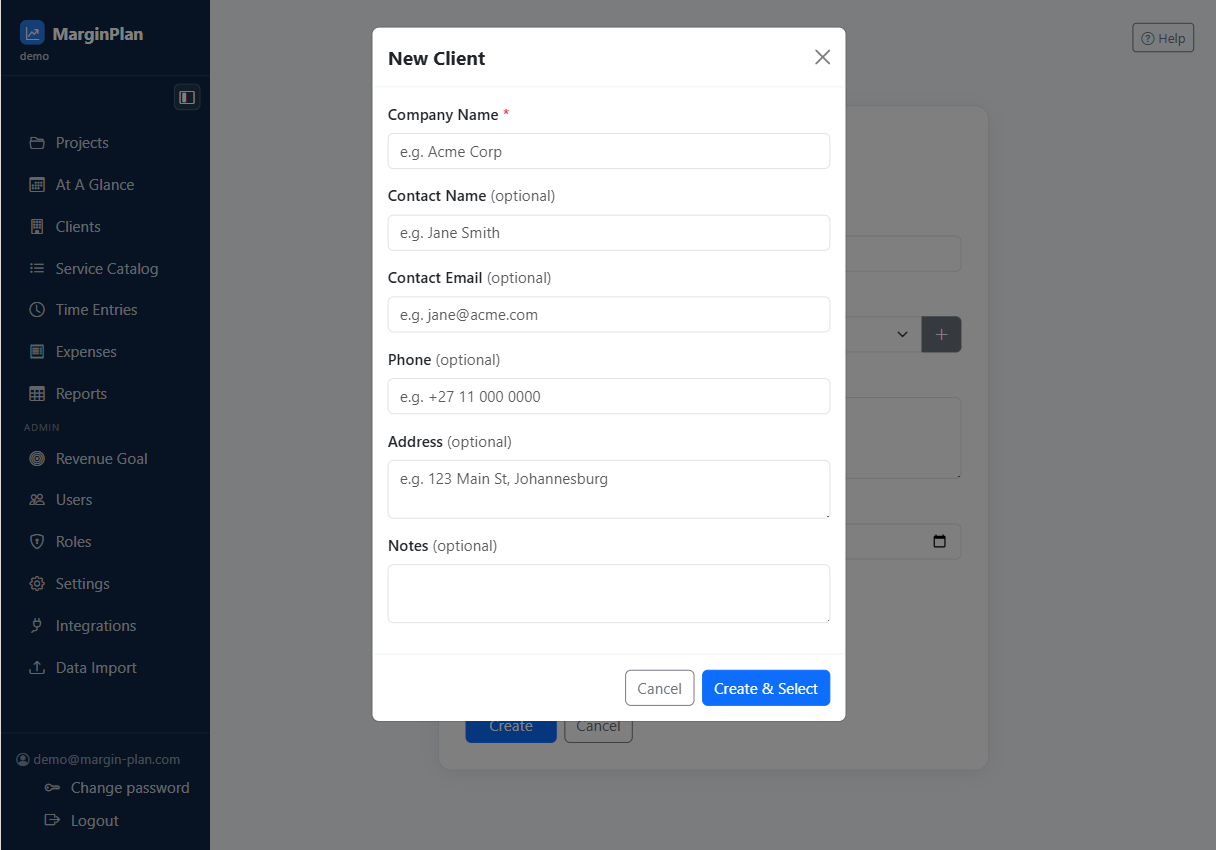
    InteractionsCreate Project form: click the + button beside Client to open New Client, complete the popup fields, then click Create & Select. Once created, it will automatically be selected in the create project dropdown.
    Use Quick Add Client only if the client is missing.
    Open workflow: Create Client
  5. Save the new project.

    InteractionsCreate Project form, bottom actions: click Create Project.
    Save the new project.

What to review

Page header and breadcrumb

Confirms whether you are creating or editing, gives you the back path, and is the quickest way to avoid updating the wrong record.

Primary form sections

The form is grouped so you can complete one block at a time instead of hunting for every field in a single long screen.

Required inputs and field labels

Every required label tells you what must exist before the record can be saved; blank or invalid values should be corrected before moving on.

Validation and inline errors

Use these messages as instructions, not warnings to dismiss. They tell you exactly which field blocks save and why.

Primary save action

Commits the record only after the form validates. Use it after reviewing every section because it is the action that changes workspace data.

Cancel or return action

Leaves the form and takes you back without finishing the workflow. Use it when you opened the wrong record or need to check related data first.

Client selection

This determines which client owns the work and where downstream estimates, quotes, and invoices will sit.

Project details

Names, dates, status, and planning fields define how the project appears everywhere else in the app.

Quick Add Client modal

If the client does not exist, this modal keeps you in flow so you can add the client without abandoning the project form.
Guardrails

  • Client, project name, and any required scheduling fields must validate before save succeeds.
  • Quick Add Client must save successfully before the new client can be attached to the project.
  • Only users who can create projects should see this page or complete the save action.

If it starts drifting

  • If the client you need is missing, use the quick-add modal or confirm you are in the right workspace.
  • If save fails, fix the first inline error rather than changing unrelated fields.