Detailed guide

Projects

The main workspace for active client work, where you create, review, and manage projects end to end.

Projects is the operational index for delivery work. It shows what exists, what needs attention, and where to jump next.

Quick summary

  • Open a project from the table when you need full delivery, pricing, billing, and tracking context.
  • Use the status and margin summaries first when you are scanning for problem work instead of a specific project.
  • Create a project only after confirming the client exists and the project should be visible to the workspace now.

Put it into practice

  1. Start a new project by clicking Create New Project.

    InteractionsProjects page, top-right button: Create New Project.
    Start a new project by clicking Create New Project.
    Open workflow: Create Project
  2. Filter the list by margin health, project status, and search criteria to narrow down the work.

    InteractionsProjects page: use the Margin Health status cards, project status cards, search, and filter controls above the table.
    Filter the list by margin health, project status, and search criteria to narrow down the work.
  3. Review project status stat cards to identify which projects need attention now.

    InteractionsProjects page: use the Project Status stat cards (Active, On Hold, Completed, Cancelled) above the table.
    Review project status stat cards to identify which projects need attention now.
  4. Use Filters and Search to narrow the list precisely. From/To keeps projects active in the selected date window (overlap logic), Status limits by Active/On Hold/Completed/Cancelled, Client limits by company, and Margin Health limits by On Track/Needs Attention/At Risk.

    InteractionsProjects page: click Filters to expand controls, set From, To, Status, Client, and Margin Health, then Apply. Use the search box to match project name, client name, status text (active, on hold, completed, cancelled), and margin health keywords (green, amber, red).
    Use Filters and Search to narrow the list precisely. From/To keeps projects active in the selected date window (overlap logic), Status limits by Active/On Hold/Completed/Cancelled, Client limits by company, and Margin Health limits by On Track/Needs Attention/At Risk.
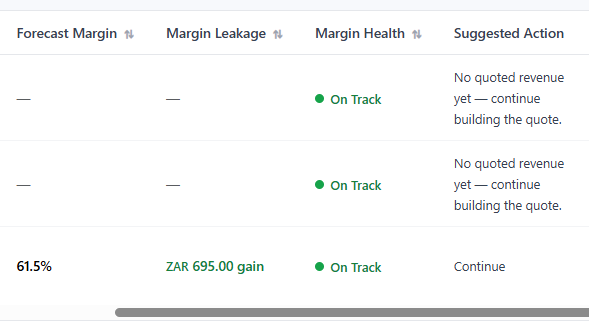
  5. Review the table indicators to prioritize work: Forecast Margin, Margin Leakage, Margin Health, and Suggested Action.

    InteractionsProjects page: on the projects table scroll to the right and scan the Forecast Margin, Margin Leakage, Margin Health, and Suggested Action columns for each project row.
    Review the table indicators to prioritize work: Forecast Margin, Margin Leakage, Margin Health, and Suggested Action.
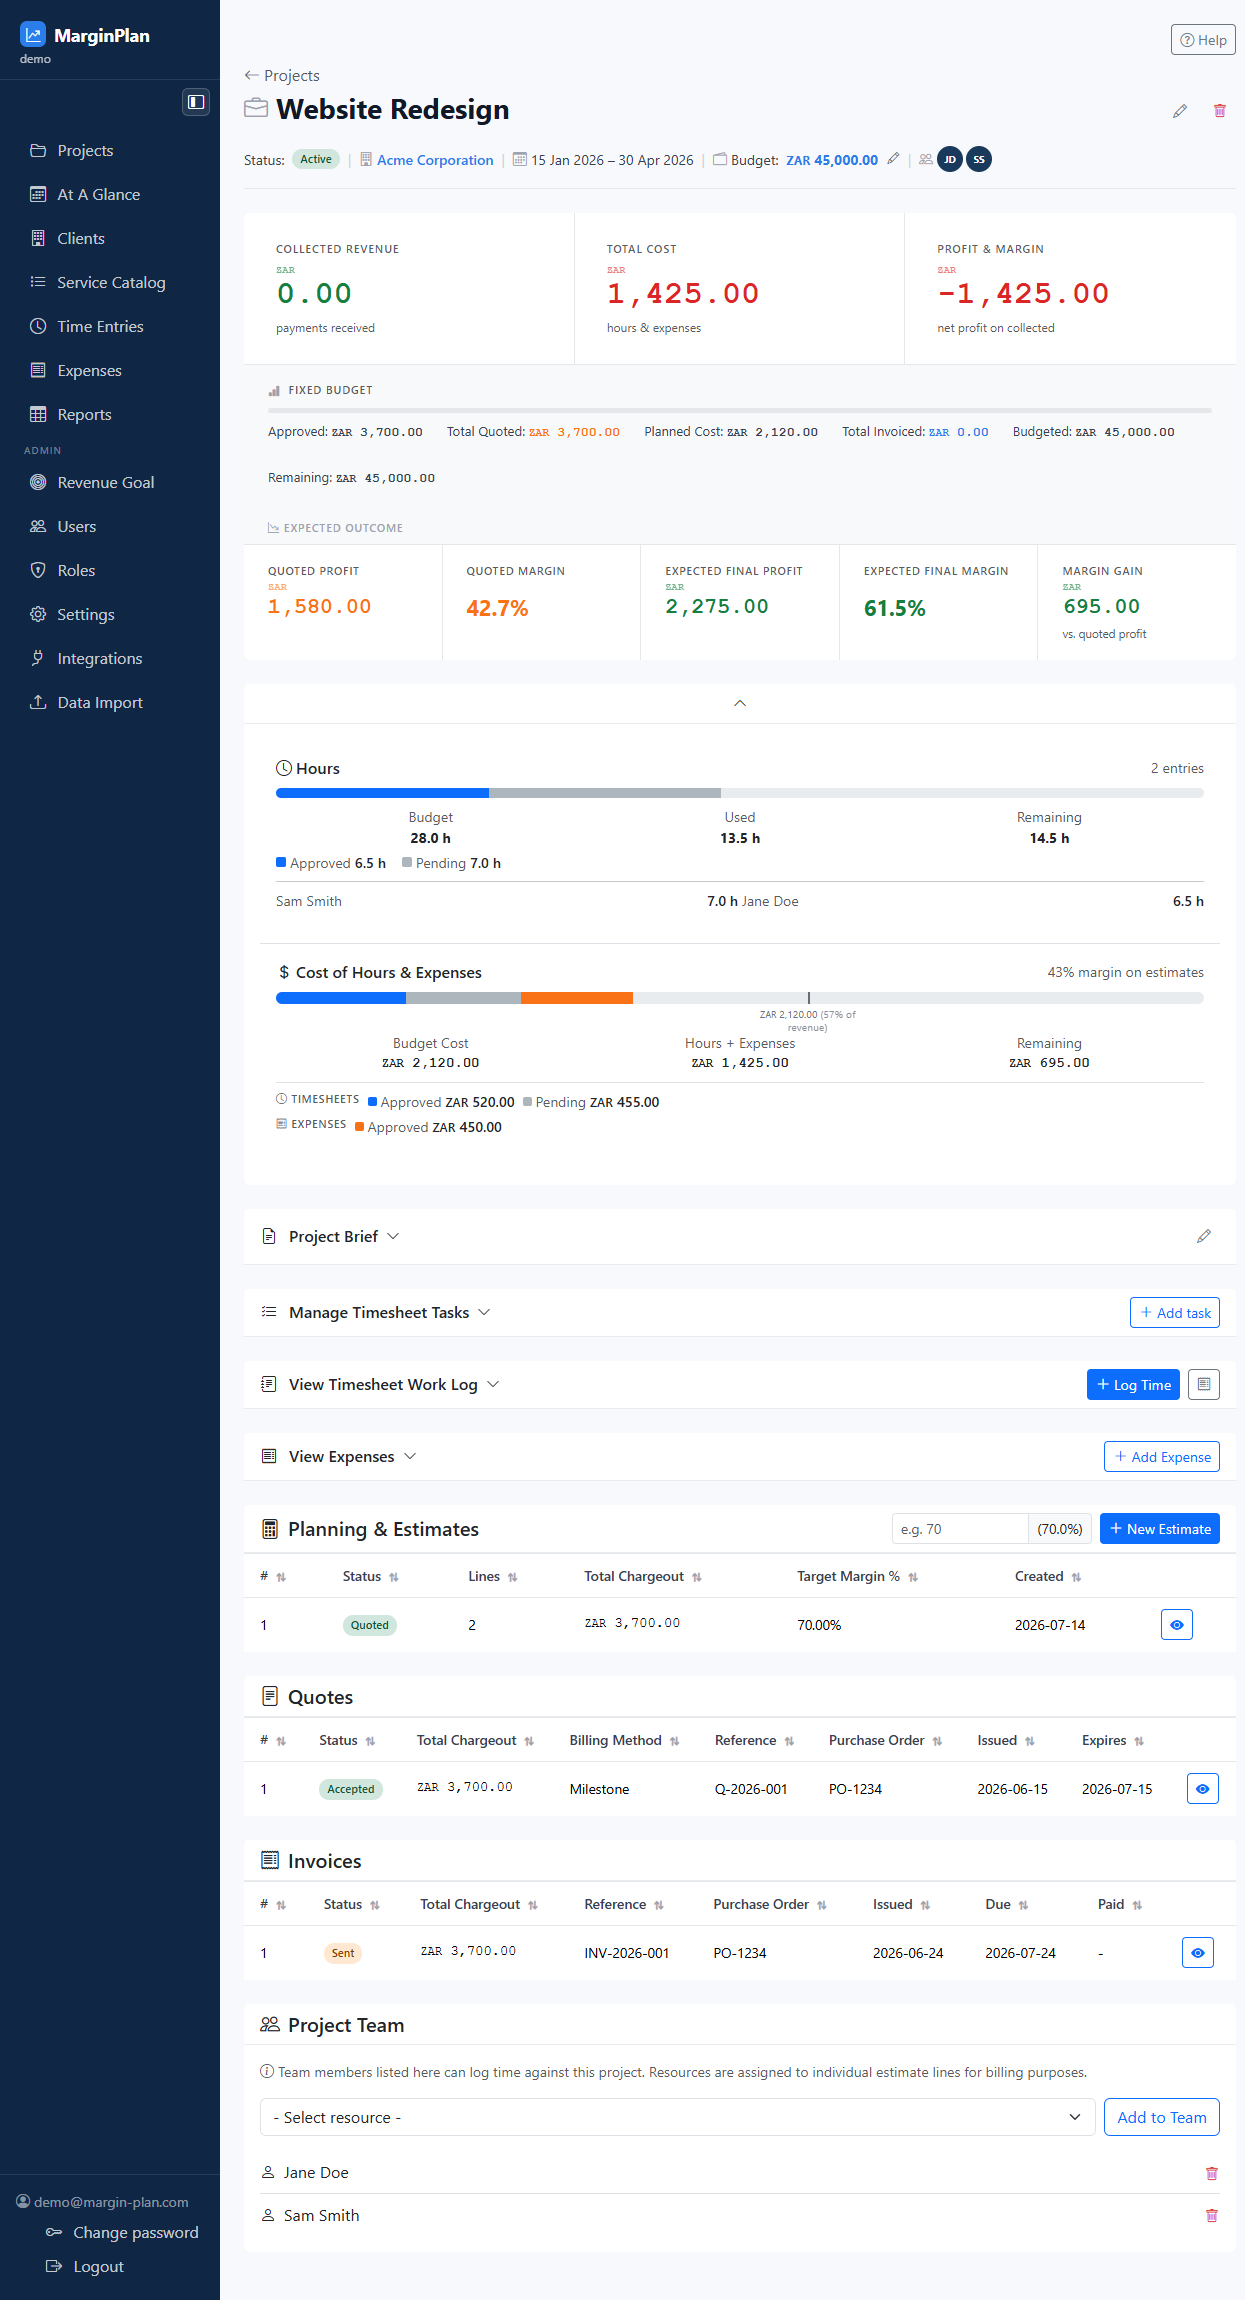
  6. Open the project detail page and review details of the project and make specific changes.

    InteractionsProjects table: click the project name, review all the Project Details.
    Open the project detail page and review details of the project and make specific changes.
    Open workflow: Project Detail
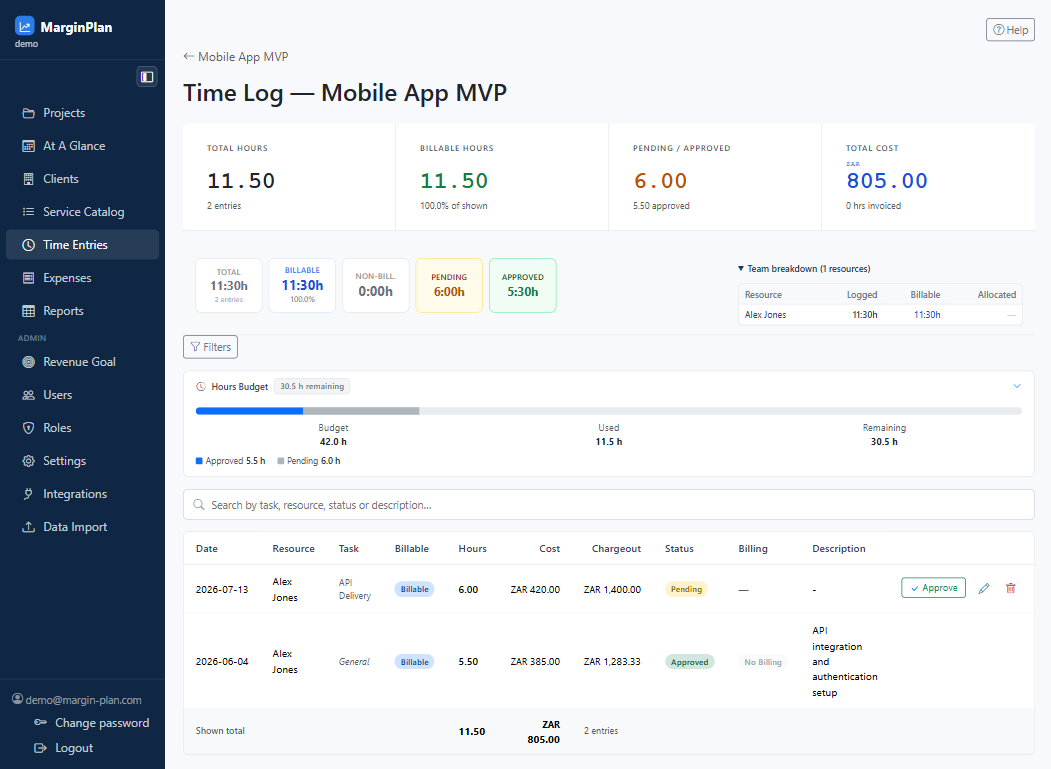
  7. Select a specific project and inspect full details, including estimates, quotes, invoices, time, and expenses.

    InteractionsOption 1: On the Projects list (<workspace>/projects/), click the small receipt icon in the project row. Option 2: Open Project Detail (<workspace>/projects/<id>) and click the small 'View Timesheet Work Log' icon.
    Select a specific project and inspect full details, including estimates, quotes, invoices, time, and expenses.
    Open workflow: Project Time Entries

What to review

Page header

Confirms you are in the live project list and usually contains the fastest path to start a new project.

New Project action

Starts project creation. Use it only after you know the client, timing, and status you want to assign.

See guide: Create Project

Status summary cards

These roll up active, on hold, completed, and cancelled work. They are a quick filter and a quick health check.

Margin or performance summary area

Highlights commercial risk before you open individual projects. Use it to spot low-margin work early.

Search, sort, and filters

Narrow the list when the workspace is busy. Sort first when you are trying to answer one question quickly.

Projects table

Every row is an entry point into the project. Review client, status, dates, budget, and linked activity before opening it.

Pagination and row controls

Use these when the table spans multiple pages so you do not mistake missing rows for missing data.

Guardrails

  • Project creation typically depends on valid client selection and required identifying fields before the record can be saved.
  • List totals can look inconsistent when filters or pagination hide rows; clear filters before assuming data is missing.
  • Users need project-view access to see the list and stronger permissions to create or edit projects.
  • Linked commercial areas such as estimates, quotes, and invoices may show or hide actions based on role.

If it starts drifting

  • If a project is missing, clear filters and check pagination before assuming it was deleted.
  • If the New Project action is absent, verify the current role includes project management rights.
  • If status counts look wrong, compare the current filtered list with the full list state.